D.I.Y. INSTRUCTIONS
How to Make Your D.I.Y. Mini Picture Book

Step 1.
Download
Find the story that you want to print.
Right-click on the red box on the story page and choose
'Save link as…'
Choose where you want to save the PDF, then click 'Save'.

Step 2.
Choose Paper Size as 'A4', Orientation as 'Landscape' and
Page Scaling as 'Fit to Printable Area'
NOTE: DO NOT print 2-sided / double-sided
(Turn Off Duplex Printing option).

Step 3.
Trim
Cut off all excess edges using a pen-knife or scissors.

Step 4.
Fold
Fold paper into half (into A5 size).

Step 5.
Fold Again
Fold paper into half again (into A6 size).

Step 6.
And Fold Again
Fold paper into half again (into A7 size).

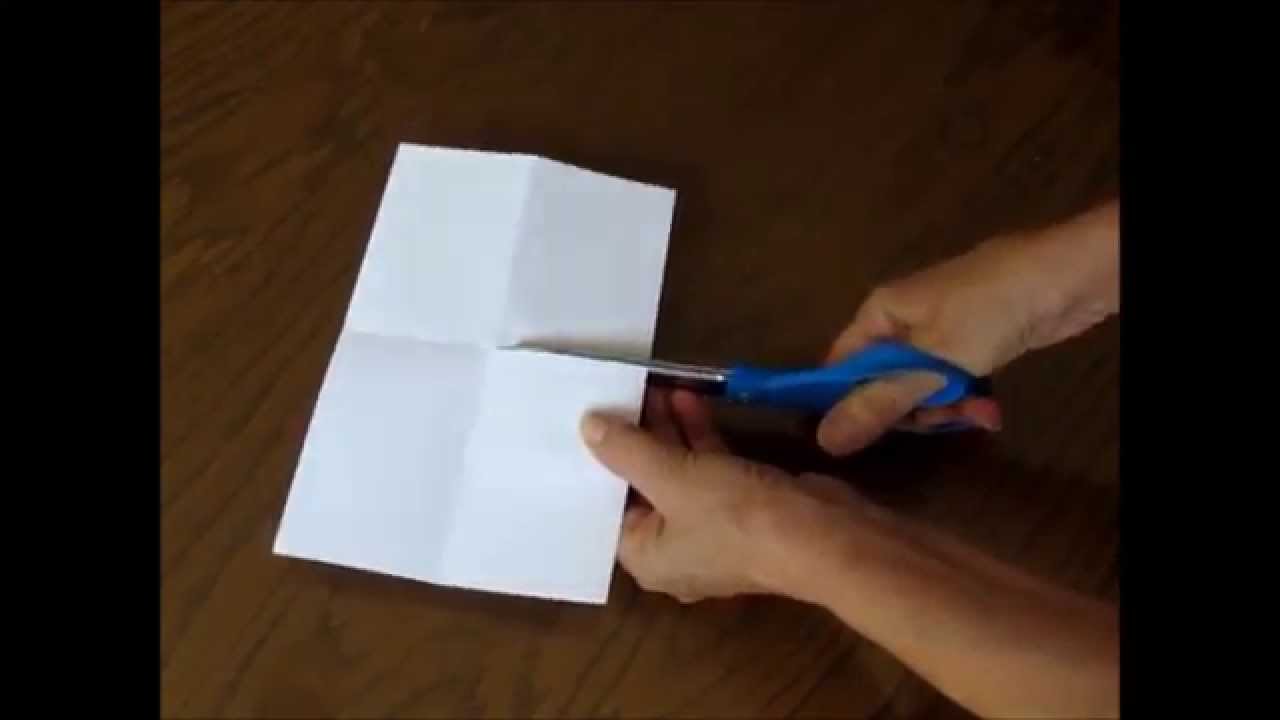
Step 7.
Unfold and Cut
Unfold the paper back into A5 (half folded) and make a cut in the line in the middle.

Step 8.
Fold and Form
Open up the paper into A4 in landscape orientation and fold it vertically down into half. Pull the middle (with the cut) outwards
to form a 6-pages booklet.

Step 9.
Glue Together
Make sure all the pages are in the correct sequence and glue the pages back-to-back.

Step 10.
Enjoy Your Book
Ta-daa! Your Mini Picture Book is ready!
Enjoy reading :)